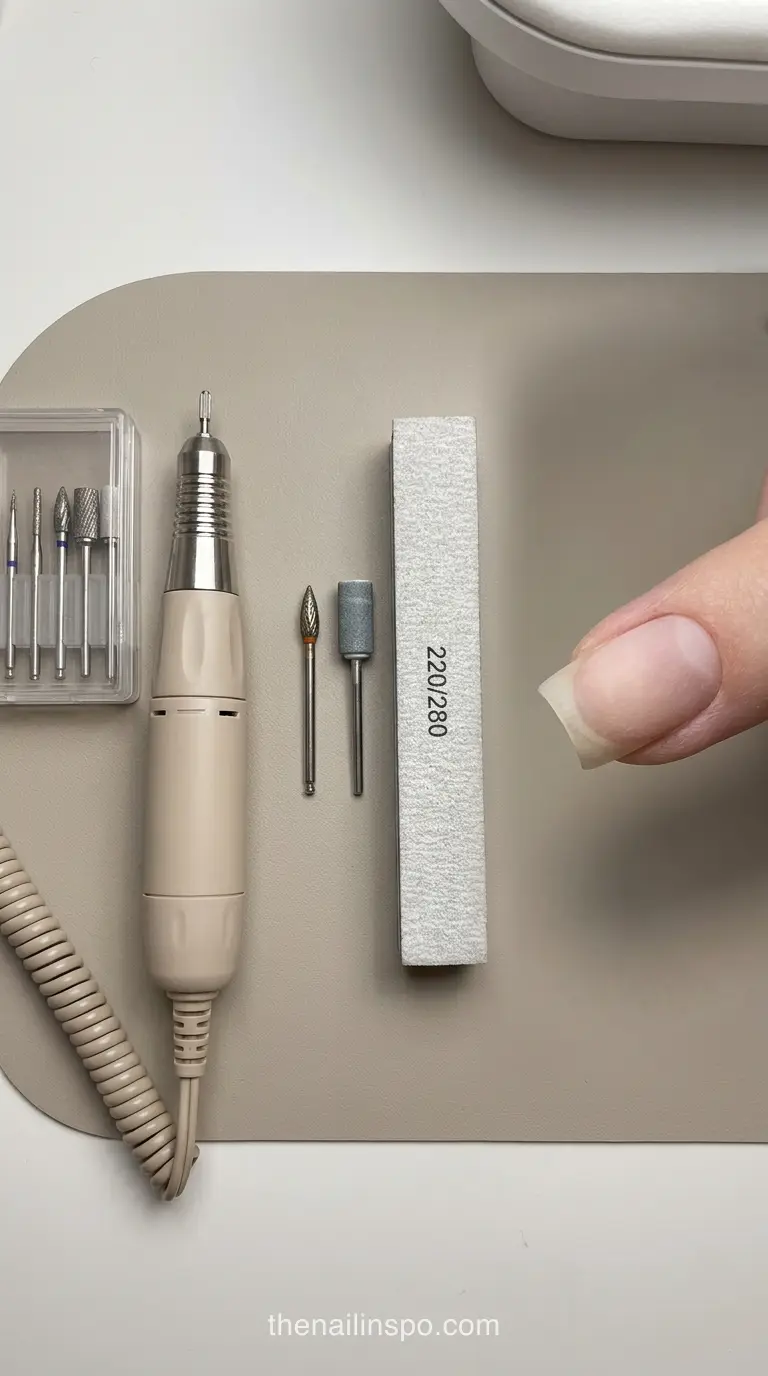
An e file for dip powder should remove only the work that needs removing: cuticle film at the perimeter, loose residue, and selected shine when the protocol allows it. It should not automatically sweep across the entire natural nail. Young Nails specifies 3,000 – 5,000 RPM with a designated 150-grit bit, while OPI uses a slow cuticle-line pass followed by hand-buffing with the 220 side of a 220/280 buffer. The safe choice depends on the bit, pressure, nail condition, and whether you’re working on new growth or a full natural plate.
Key takeaways- A natural nail does not need full-surface e-filing just because an electric file is available.
- Young Nails specifies 3,000 – 5,000 RPM for a designated 150-grit bit during natural-nail enhancement prep.
- Erica’s ATA lists 6,000 – 10,000 RPM for flame diamond bits and 6,000 – 12,000 RPM for tapered diamond bits.
- Keep the working surface parallel, use light pressure, and keep the bit moving.
- Visible color should remain over the natural nail during removal before the appropriate remover soak.
E file for dip powder: seven safe prep steps
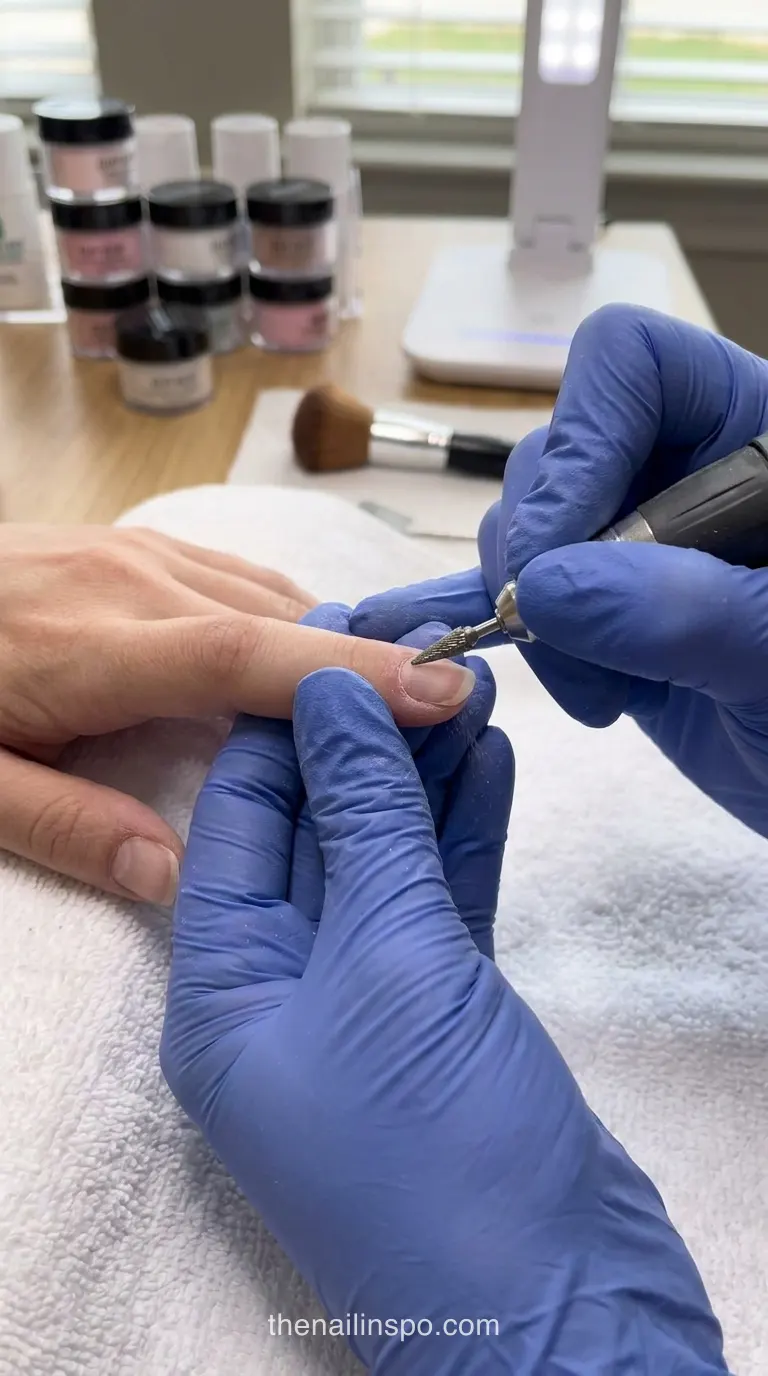
The safest seven-step sequence is inspect, clean, expose the cuticle line, refine only the needed area, remove selected shine, clear dust, and reassess before product application. That sequence matters because prep is not one single filing action. The perimeter may need controlled diamond-bit work, while the plate may be better handled with a hand buffer or left alone if it is already clean and matte.
How fast should an e-file run for dip powder?
For a designated 150-grit bit, Young Nails specifies 3,000 – 5,000 RPM for natural-nail enhancement prep. Erica’s ATA gives 6,000-10,000 RPM for flame diamond bits and 6,000-12,000 RPM for tapered diamond bits. These ranges are not interchangeable. Match speed to the bit and task, then let rotation perform the abrasion instead of forcing the tool.
E-file nail prep starts at the cuticle line
Cuticle-line prep should stay localized because the unwanted film is concentrated at the perimeter, not spread evenly across the whole plate. Use the slowest controlled speed appropriate for the bit, keep the working surface parallel, and avoid parking the bit in one spot. If the plate already has the required texture, stop there.
Step 1: Inspect the natural nail
Check for existing product, lifted edges, sensitivity, cracks, or a plate that has already been heavily thinned. Do not treat every nail as a blank canvas. Your starting condition decides whether the service needs targeted new-growth prep or a gentler hand-buffing approach.
Step 2: Clean and expose the perimeter
Remove surface debris and make the cuticle line visible before bringing in the bit. The goal is a clear working boundary, not aggressive removal of living tissue. Work in short, controlled passes so dust does not hide the edge you are trying to refine.
Step 3: Select the bit and speed
Use the bit-specific guidance rather than copying a speed from another service. A designated 150-grit bit and a flame diamond bit have different working ranges. If you cannot identify the bit or its intended use, hand-buffing is the better decision than guessing.
Step 4: Refine the cuticle line
Keep the bit parallel to the nail and use light pressure. Move continuously around the perimeter, allowing the rotation to perform the abrasion. Do not chase a perfectly bare-looking nail if the surface is already clean and prepared.
Step 5: Decide whether the plate needs buffing
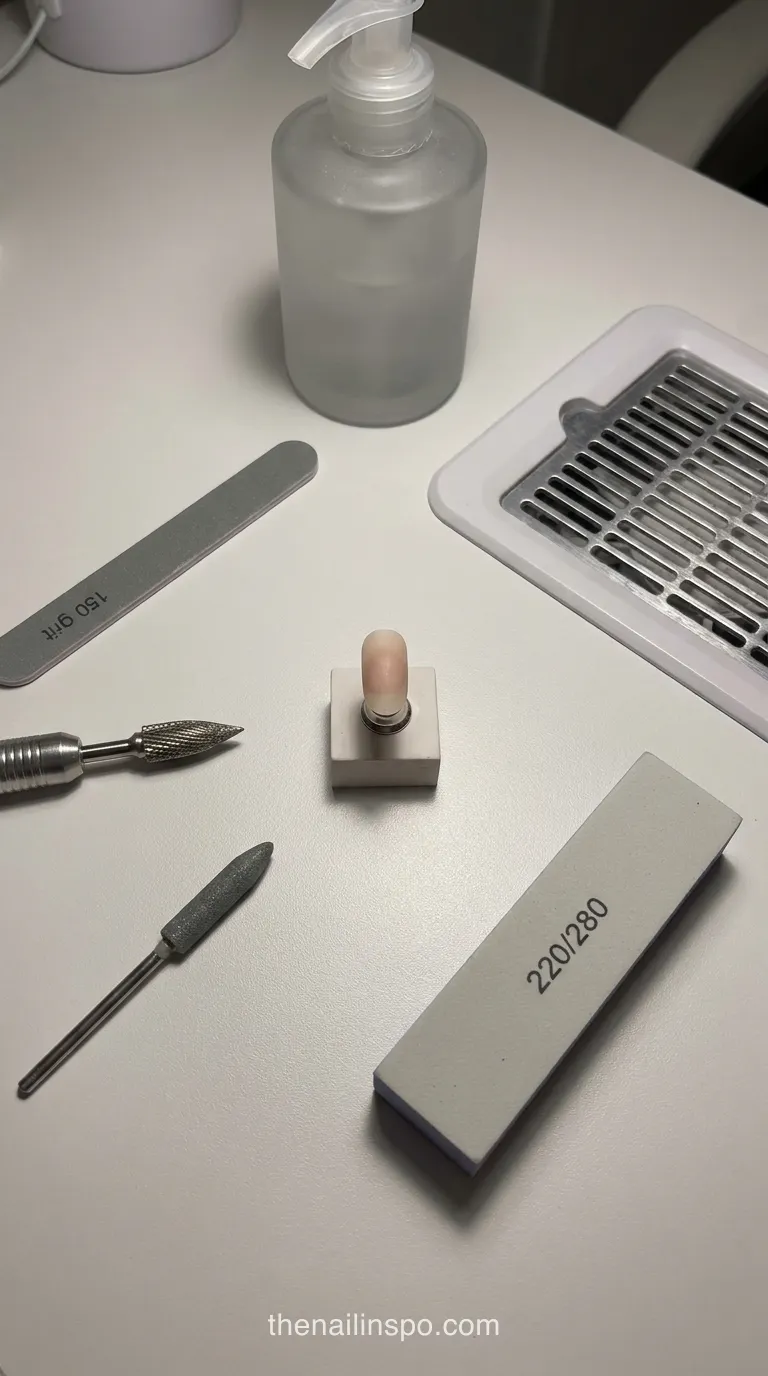
If the protocol calls for plate preparation, OPI specifies hand-buffing with the 220 side of a 220/280 buffer. If the plate is thin, flexible, or already matte from a previous service, remove less. “More prep” is not automatically better prep.
Step 6: Remove dust at the source
Clear the nail and surrounding workstation so remaining dust does not obscure the surface or contaminate the service. Local exhaust, including a downdraft table or portable local-exhaust unit, captures filing dust at the workstation and gives you a cleaner view of the nail.
Step 7: Reassess before applying product
Look at the perimeter, the plate, and the new growth separately. If one area is clean and appropriately textured, stop working there. The final inspection is where you catch unnecessary passes before they become part of the finished service.
Sophia Beed’s note: The most useful question is not “Can I file this?” It is “What exactly still needs filing?” That change prevents a lot of repeated abrasion.
 Read NextWhy Do Acrylic Nails Lift? 6 Secrets to Stop It Now
Natural nail prep: hand buffer or e-file?
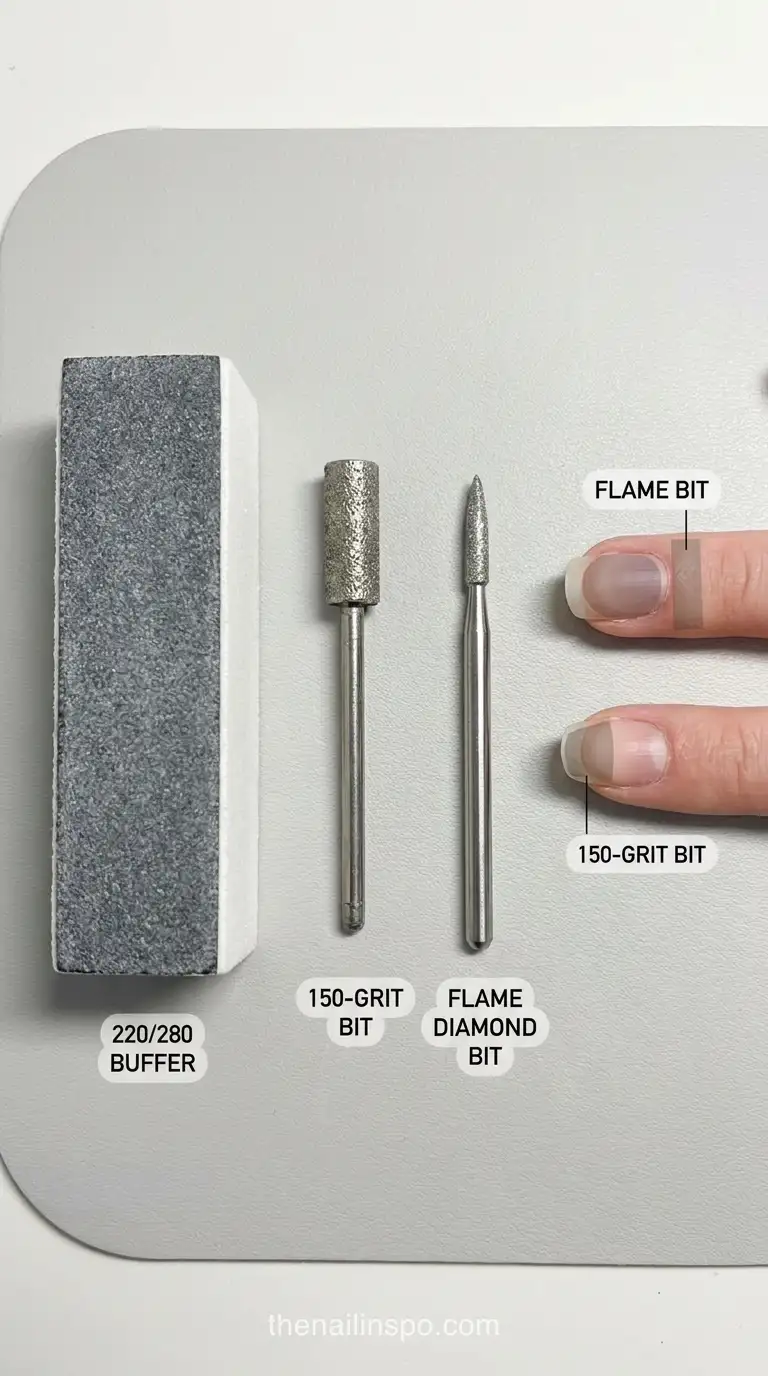
Natural nail prep has no single universal protocol. OPI separates cuticle-line e-filing from plate buffing, DipWell rejects e-filing the natural nail, and Young Nails permits a designated 150-grit bit at 3,000-5,000 RPM. My verdict is simple: use the least aggressive method that produces the required surface, especially when the nail is already thin or has been prepped recently.
150-grit bit vs 220/280 buffer
A designated 150-grit bit is a specific protocol choice, not permission to use any coarse bit anywhere on the nail. A 220/280 buffer gives slower, more tactile control over plate shine. If you are uncertain about the nail condition or product system, the 220 side of the buffer is the more conservative choice for the plate.
| Method | Best use | Main limitation | Verdict |
|---|---|---|---|
| Designated 150-grit bit | Protocol-specific natural-nail enhancement prep at 3,000-5,000 RPM. | Requires correct bit selection, speed control, and a moving parallel pass. | Use only when the system specifically permits it. |
| Flame diamond bit | Controlled cuticle-line and perimeter refinement. | It is not a substitute for a plate-prep protocol. | Useful for the perimeter, not automatic full-plate filing. |
| 220/280 buffer | Manual removal of selected plate shine. | Can still over-buff if repeated aggressively. | Best default when the plate is thin or the protocol is unclear. |
| No natural-nail e-filing | Services following a system such as DipWell’s natural-nail guidance. | Requires careful surface cleaning and product-specific preparation. | Choose it when the product system rejects e-filing. |
When hand-buffing is the better choice
Hand-buffing is the better choice when the natural nail is thin, flexible, visibly over-filed, or already prepared from recent services. It also makes sense when the product manufacturer does not authorize natural-nail e-filing. A slower tool is not automatically safer, but manual feedback makes it harder to remove material without noticing.
Flame diamond bit technique for cleaner cuticle work
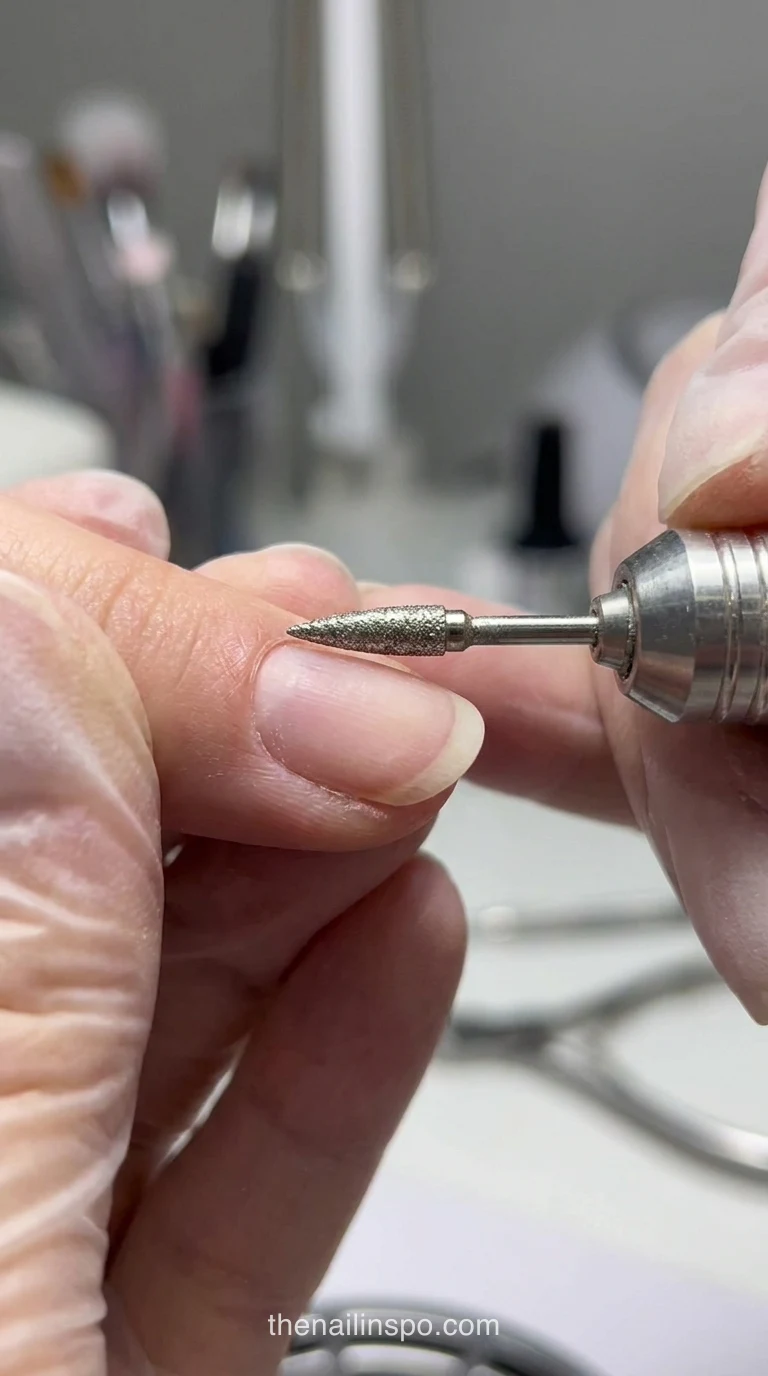
A flame diamond bit is designed for controlled perimeter work, where its shape can reach the cuticle line without requiring broad passes across the natural plate. Erica’s ATA specifies 6,000-10,000 RPM for flame diamond bits. The practical control points are parallel positioning, light pressure, continuous movement, and frequent visual checks.
Flame diamond bit control for beginners
Beginners should prioritize a stable hand and visible contact over speed. Start within the published working range for the bit, keep the contact brief, and do not use pressure to make the tool “work faster.” If dust or glare makes the cuticle line hard to see, stop and clean the area before continuing.
Why the bit stays parallel to the nail
Keeping the working surface parallel distributes contact instead of concentrating the abrasive edge into a narrow point. Light pressure prevents the bit from digging, while movement prevents heat and uneven thinning in one location. The bit should glide; if it catches, your angle, pressure, or speed needs attention.
 Read NextHard Gel vs Acrylic: Which One Is Best for You?
Dip powder lifting: what causes it and how to limit it
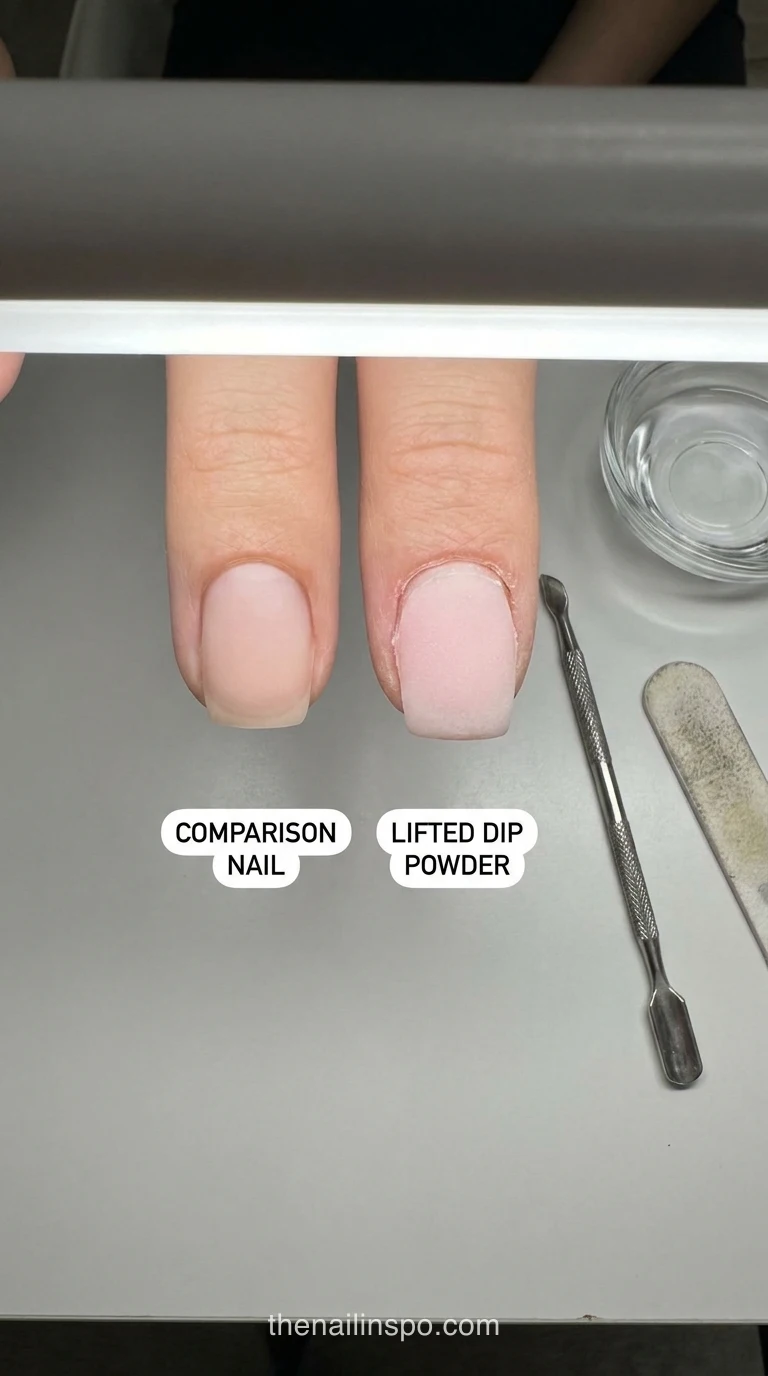
Dip powder lifting can follow incomplete cuticle-line cleaning, remaining dust, incompatible prep steps, or repeated filing that leaves the natural nail unnecessarily thin. More abrasion is not a reliable fix. A clean perimeter, appropriate surface texture, and product-specific prep give you a better starting point than filing the entire nail harder.
New growth prep versus full re-prep
New growth should be treated as new growth. Filing the entire natural nail at every service repeats abrasion on areas that may already meet the product requirement. If the older surface is clean and stable, focus on the transition and perimeter instead of resetting the whole plate.
How nail plate thinning starts at the workstation
Thinning often begins with small repeated decisions: using the same speed for every bit, holding the tool in one spot, pressing when the bit feels slow, or re-prepping the full plate because it is routine. Better dust capture also matters because a clean view lets you stop when the surface is ready.
Sophia Beed’s note: Sanding bands are single-use. Reusable metal bits need cleaning and disinfection between clients under the sanitation rules that apply to your workplace.
- Dip powder for weak nails helps you adjust product choices when the natural plate needs a gentler approach.
- How to remove dip nails at home explains why visible color should remain before the final remover soak.
Dip powder prep mistakes: FAQs for safer services
Can you e-file the natural nail before dip powder?
Yes, some systems permit it, but the protocols conflict. Young Nails specifies a designated 150-grit bit at 3,000-5,000 RPM, while DipWell rejects natural-nail e-filing and OPI uses hand-buffing for the plate. Follow the product system first, then adjust for the nail’s condition rather than treating e-filing as mandatory.
How long should dip powder removal take afterward?
OPI advises leaving visible color over the natural nail before finishing with a remover soak of about 10-25 minutes, depending on the remover. Do not keep filing until the natural nail is completely exposed. The remaining product should be softened according to the remover’s instructions.
Should the e-file speed stay the same for every bit?
No. A 150-grit bit and a flame diamond bit have different published working ranges and different jobs. Use the bit manufacturer’s guidance, keep pressure light, and reassess the surface instead of assuming a higher speed will create better prep.
Is a rougher natural nail always better for adhesion?
No. Rougher is not automatically better. Adhesion prep should create the surface required by the product system without unnecessary removal of natural nail. If the nail is already clean and appropriately textured, additional passes add risk without adding useful preparation.
For the next service, separate the perimeter from the plate before touching the tool. Identify what needs removal, choose the bit or buffer that matches the system, and stop as soon as the surface meets the requirement. That is the difference between controlled prep and routine filing.
Comments (0)
No comments yet. Leave a thought below!